
Adding articles to the Research Faculty Directory through “claiming” in Symplectic Elements
Your Research Faculty Directory profile is populated with articles through the Symplectic Elements system. Some articles (e.g. those that contain your ORCID or email address) will be added automatically to the Directory, but others are held as “pending” until you approve (aka “claim”) or reject them.
Step by Step:
- Log in to Symplectic Elements using your Netbadge ID and password. You will be on your Homepage of the system used to collect articles and suggest for you to “claim” as yours or not.
- If you have been give rights to work in Elements for a faculty member, click on the Impersonate button
 at the upper right of the page. Search for the faculty member’s name from the resulting list and select to manage their data.
- If you have been give rights to work in Elements for a faculty member, click on the Impersonate button
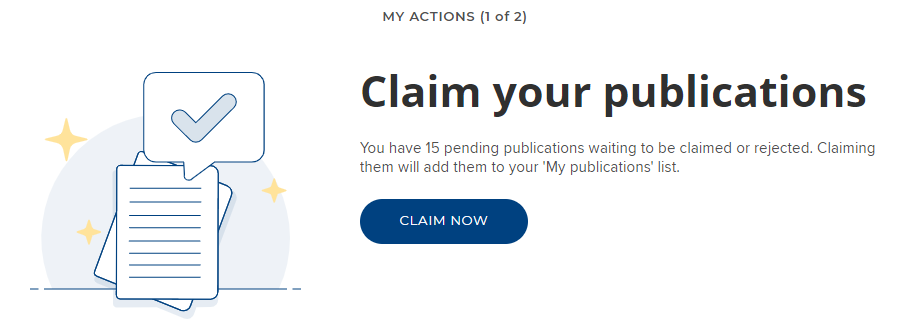
- If you have pending publications, you’ll see a Claim your publications box (see below). To view and claim or reject the pending publications, click on the Claim Now button (see below):

- NOTE:if there are hundreds of pending publications, do not go through them! Consult the section on Adding Additional Journal Articles to Your Research Faculty Directory Profile which has tips on methods to better capture your publications.
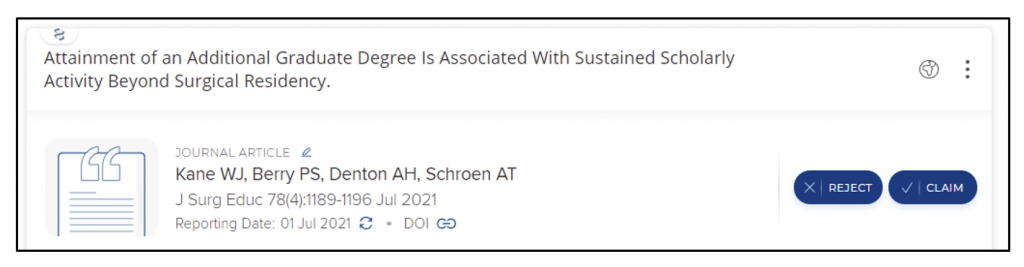
- Review each publication in your list, choosing the Reject or Claim buttons to the right of the citation as appropriate (see below):
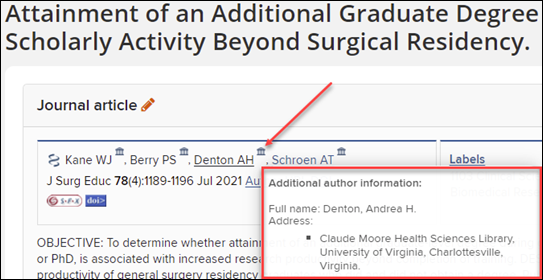
- If you’re unsure if a publication is yours, you can click on the title of the publication to see the full record in Symplectic Elements. On this full screen you can:
- click on the rotunda symbol next to the author’s name to get a popup with more author information (see below) – or –

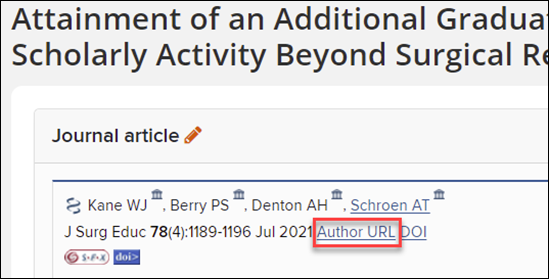
- click on the Author URL link to go to the database (e.g. PubMed), or the DOI to get to the full article (see below):

- click on the rotunda symbol next to the author’s name to get a popup with more author information (see below) – or –
- Pro tip: You can use the Filters at the right to help create a subset of your publications to easily review and claim or reject. For example, if you frequently publish in surgery journals, you can put a root such as surg in the Journal box. If you see many publications that aren’t yours in another field, e.g. physics, you can add the root phys to the Journal box. This will display a subset of your publications making it easier to browse and claim/reject in batches, using the checkboxes as above in Step 3.
- If you are still missing articles, follow steps in Section B below.
B. Adding additional journal articles to your Research Faculty Directory profile
Your Research Faculty Directory profile is populated with articles captured through the Symplectic Elements system. Elements will automatically add articles in some cases:
- that appear on your ORCID profile page
- that match email address(es) OR ORCID you’ve published under
Elements sometimes suggests articles to be claimed by you:
- that match your Elements author search settings
If your Faculty Directory listing does not include all your journal articles, add them following one or more of the methods below, listed in order of preference.
Method 1: ORCID
- If you already have articles in your ORCID profile, they can be directly imported by Elements to your profile. If you’d like to add articles to ORCID, use one of the recommended methods to add your works to your ORCID record. See: Guide to ORCID from the Health Sciences Library.
- To connect Elements to your ORCID works, click on the Menu
 then, under Settings, Automatic Claiming.
 - Under Add external profiles, you may see an ORCID suggested (see below). If it’s yours, you can click on Connect to this account to initiate automatic claiming of publications for works associated with your ORCID profile (see below):
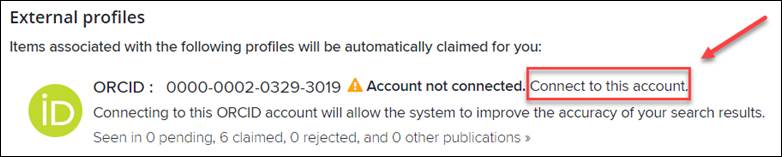
- If no ORCID is suggested, click on ORCID from the list, (see below). You’ll be taken to ORCID to login and then can connect your account to Elements.

Method 2: Add Email addresses and ORCID IDs in Elements
- Elements adds articles to your Research Faculty Directory by matching email addresses and/or researcher IDs (like ORCID) in published articles to those provided in your Elements profile.
- Elements will suggest email addresses and/or identifiers for you based on articles that have already been claimed.
- Suggested identifiers may appear at the top of your pending publication list (see below):

- To see all current and suggested identifiers, click on the Menu . Under Settings, click Automatic Claiming. Suggested ORCIDs will appear under External Profiles, and you can click the Manage button to determine whether the system should use the ORCID to claim publications (see below):

- You can also add email addresses.
- From the Menu under Settings, click Automatic Claiming.
- Scroll down to Add email addresses and add any email addresses that are associated with your author name in your articles.
- From the Menu
- Suggested identifiers may appear at the top of your pending publication list (see below):
Method 3: Name-based Searching in Symplectic Elements
- Click on the Menu button at the top left of the Homepage and under Settings, click on Name-based Search.
- Scroll down to Name-based searches. These options dictate how articles are searched by the Elements system in databases like PubMed to be placed in “pending” for your review.
- Name-based Searching: Name Variants
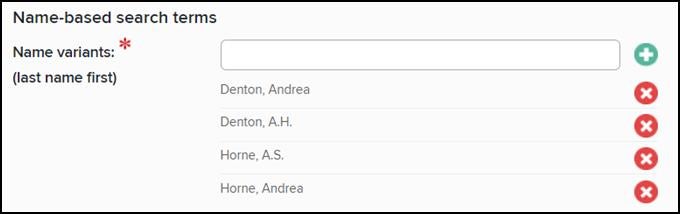
Name variants should include all the variations of names you publish under, including First Name, Middle Initial, Last Name.
The default settings are last name and initials, and/or last name, first name (see below):

Add any variants needed, following the instructions. Consider carefully whether you need to include a last name + single initial option: this may retrieve too many publications that are not yours. Hint: you can always gather citations in stages. Begin with the most precise variants like last name + first name.
As you add each variant, make sure to click the green + button ![]() to save your entry – it will appear in the list below the box (see below). When you are finished, click the Save button at the bottom of the page.
to save your entry – it will appear in the list below the box (see below). When you are finished, click the Save button at the bottom of the page.
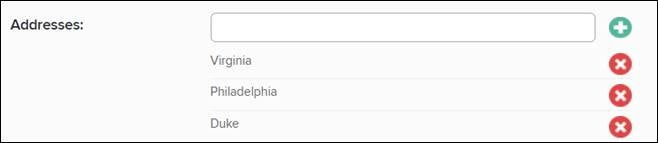
Name-based Searching: Addresses
Enter words associated with all the previous institutions you’ve published under, avoiding the words “university” or “college” (see below). Use the green plus button ![]() to add each, and again make sure to Save at the bottom of the page. Do not skip this step as it helps to collect the correct information/metadata for your publications.
to add each, and again make sure to Save at the bottom of the page. Do not skip this step as it helps to collect the correct information/metadata for your publications.
There are Advanced Terms included, in order to either populate publications from a specific start date, publication keywords, or journal titles. This section will be closed as an accordion by default. Click on the down arrow on the far-right of the section.
![]()
In the opened Advanced Terms section,
Scroll to the top of the Name Based Search screen to the Status box. To gather results now, click the Run my searches button. Wait a few moments until the Status displays that your Last search succeeded in PubMed and Web of Science (see below):

Now visit your Elements homepage again by clicking on the Home button ![]() in the upper left. You should now see that there are publications pending for your review. Click on the Claim Now button to review the publications.
in the upper left. You should now see that there are publications pending for your review. Click on the Claim Now button to review the publications.
Finally, you may wish to reset your Name-based Settings to your current names and affiliation. Click on the Menu ![]() then under Settings, Name-based Search remove the previous institutions, always leaving Virginia in the Address field for best results going forward.
then under Settings, Name-based Search remove the previous institutions, always leaving Virginia in the Address field for best results going forward.